 |
Matronics Email Lists
Web Forum Interface to the Matronics Email Lists
|
| View previous topic :: View next topic |
| Author |
Message |
bakerocb
Joined: 15 Jan 2006
Posts: 727
Location: FAIRFAX VA
|
 Posted: Thu Sep 09, 2010 4:23 am Post subject: Photo Details Posted: Thu Sep 09, 2010 4:23 am Post subject: Photo Details |
 |
|
9/9/2010
Hello Mike, You wrote:
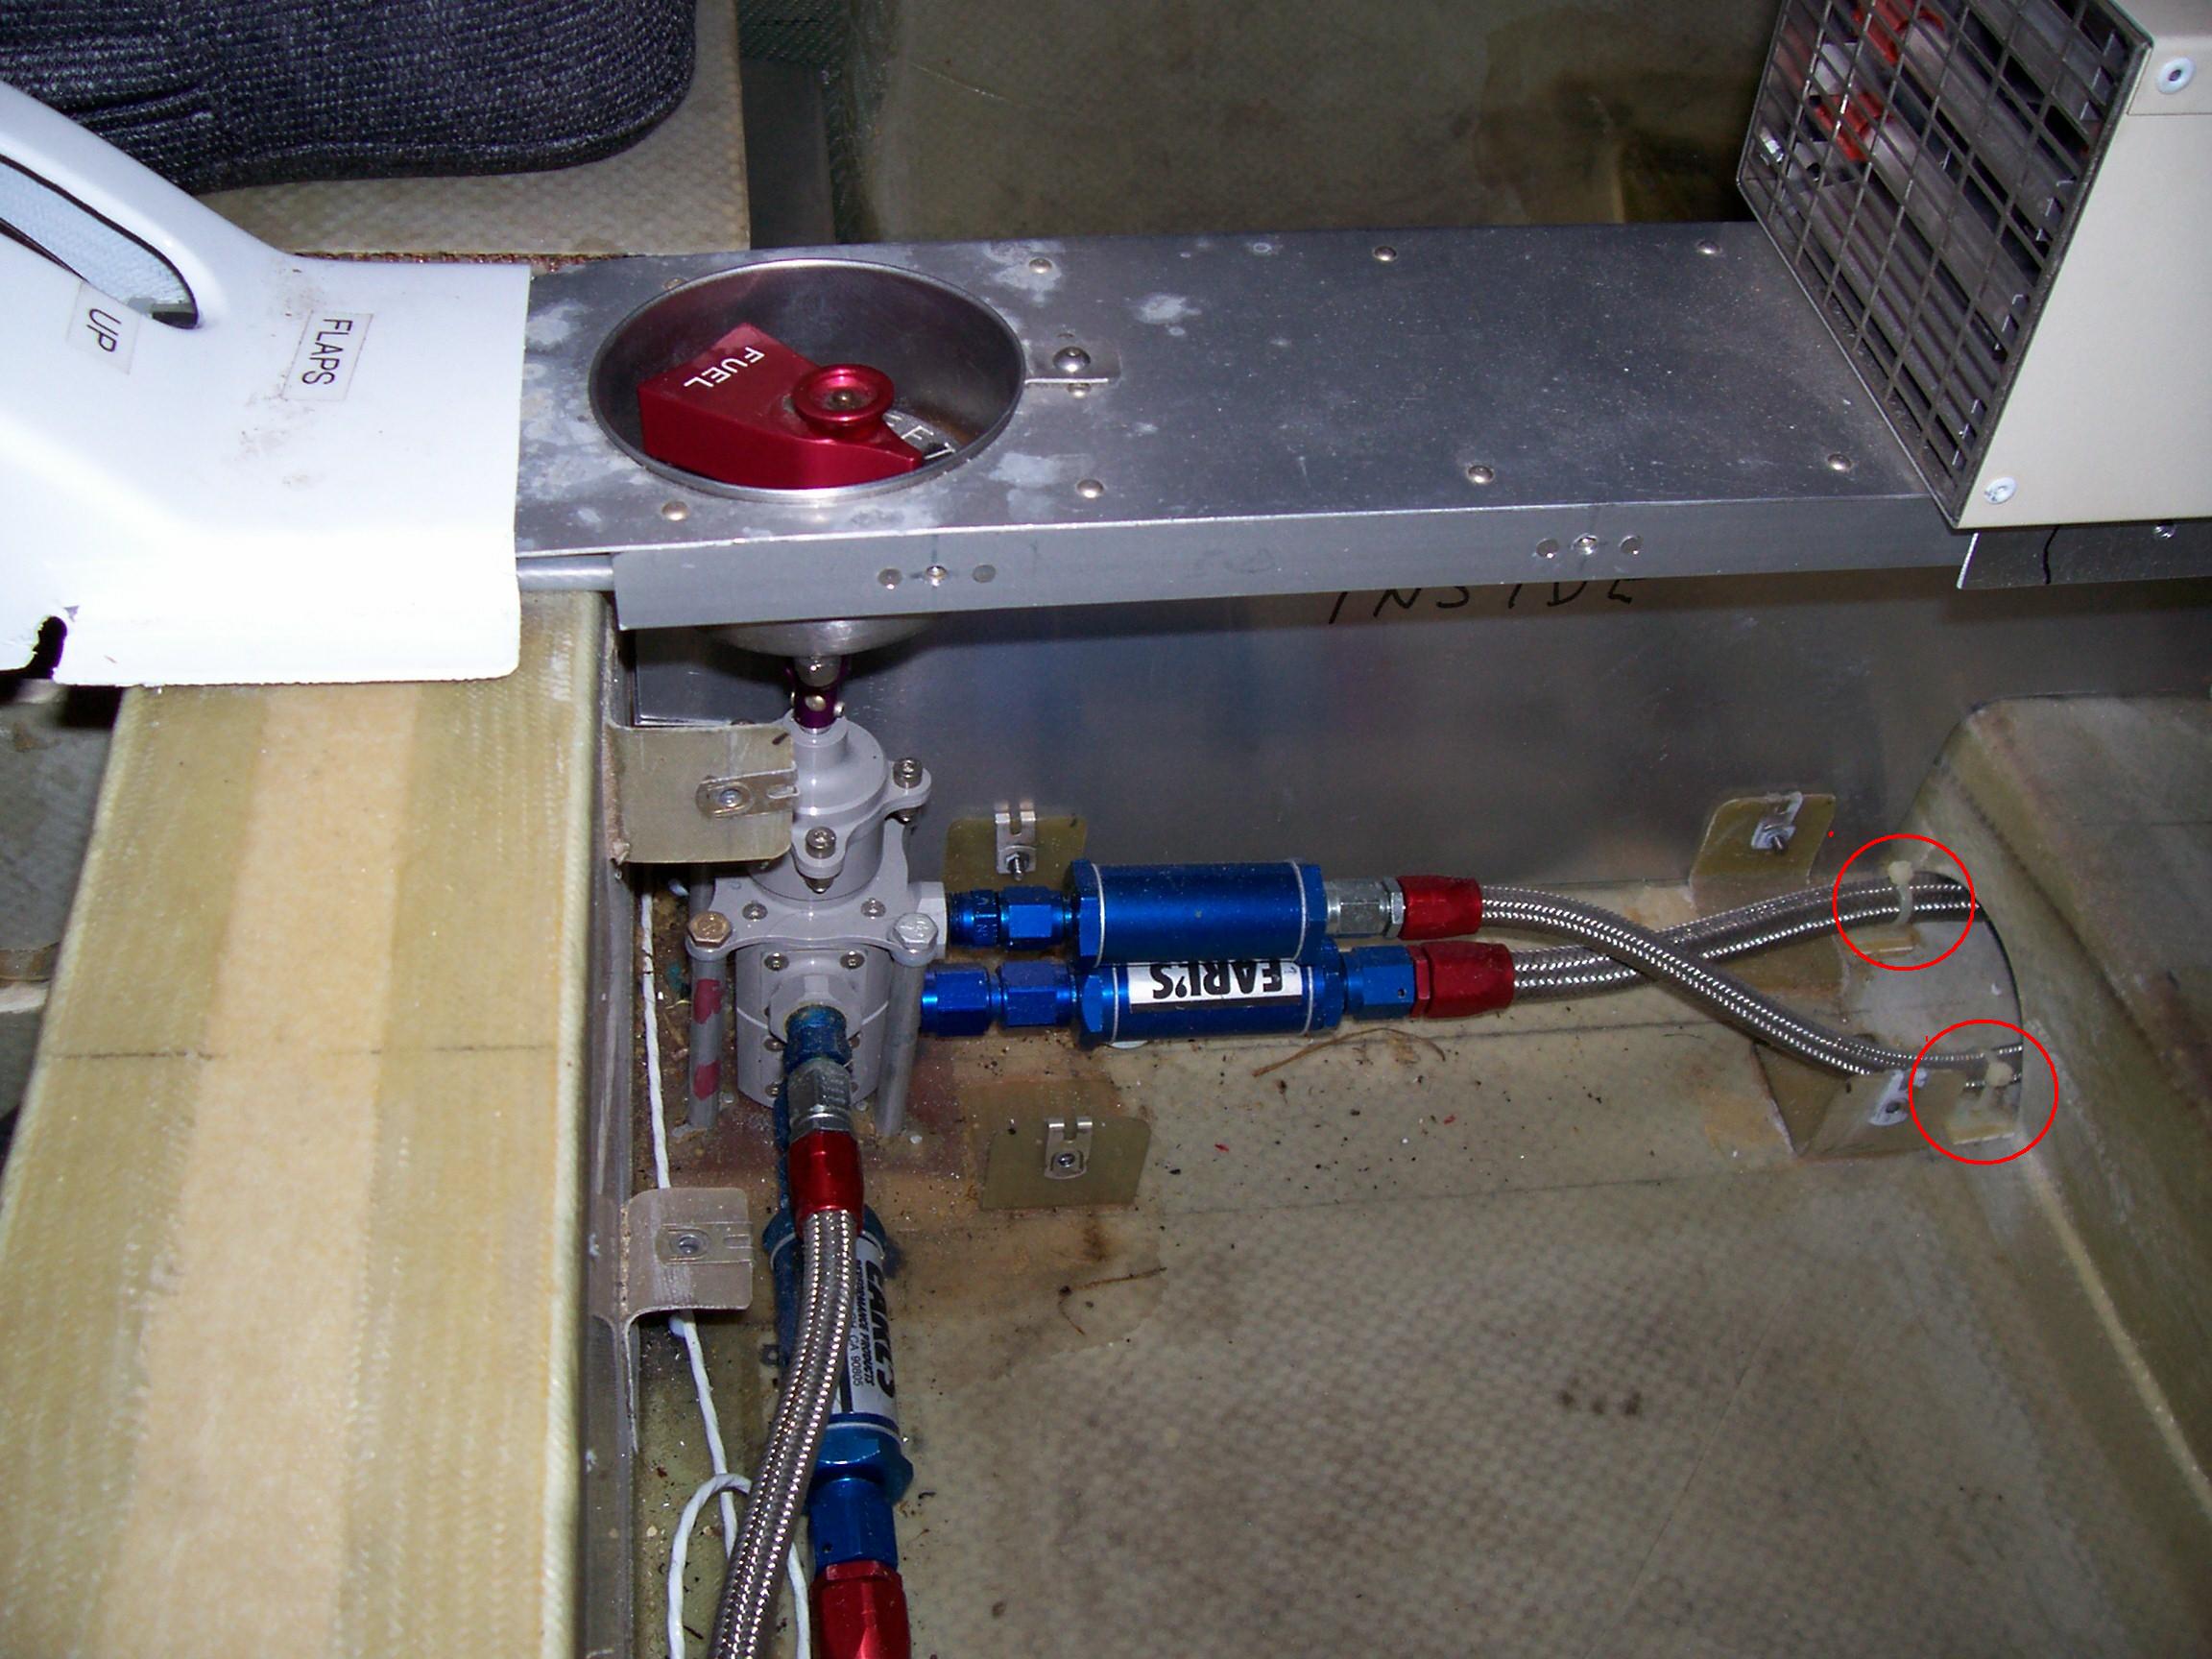
1) "What are the items that I circled in red that you use to hold down your
fuel lines?"
Those are my patented 90 degree fiberglass brackets -- you can use them by
paying me a huge royalty fund -- just kidding.
I made a bunch of 90 degree fiberglass brackets by laying up several layers
of fiber glass along the corner of a 2 inch X 4 inch wooden stud (chosen
because the corner was slightly rounded) that had been covered with
packaging tape so the epoxy would not stick. The layup can be as long as you
desire depending upon how many brackets you wish to make.
Each leg of the bracket can be as wide as you wish -- see the larger
brackets with the clip nuts that are used for mounting the console cover and
also on the front of the wing box for mounting an aluminum angle that
protects the fuel lines leading from the wings into the fuel valve. The leg
length of the brackets can either be cut with a knife while the layup is
still fairly soft or cut with a band or jig saw after the layup is cured and
popped off the 2 X 4.
After the layup is cured and removed from the 2 X 4 a band saw or jig saw is
used to cut the layup into individual brackets of the width desired.
Holes are then drilled into the legs of each individual bracket for the
purpose of:
A) Using a tie wrap / zip tie -- as you see with the fuel lines;
http://tiewraps.com/zip_tie_selection_page.html
B) Installing a clip nut -- as you see with the console cover mounting
brackets;
C) Permitting some epoxy to ooze through a hole (or two) on the side being
fastened to the structure to provide better adherence.
My favorite mounting epoxy for these brackets is a two part epoxy gel,
something like this:
http://www.tapplastics.com/shop/product.php?pid=338
that you can buy from a good hardware store -- quick, convenient,
economical.
2) "Is there anything else that you can recommend to hold wiring and/or fuel
lines in place."
Not that comes to mind right off -- these brackets have done every job for
me and I have used them throughout the plane for all sorts of mountings.
3) "Keep well."
As long as Kentucky keeps making bourbon by the barrel I intend to be very
well.
4) "Thanks for your help."
You are welcome -- Have fun.
'OC' Baker Says: "The best investment we can make is the time and effort to
gather and understand knowledge."
PS: A few points that this photo brings to mind:
1) The fuel tank selection valve is unfortunately located right under the
flap handle when the flaps are up -- this is inconvenient and I wish that I
had located the valve further foward.
2) The neat recess for the fuel valve handle is a stainless steel measuring
cup.
3) The little electric heater mounted on the console is useless for heat and
generates noise on the radio. It has been removed.
===================================================================
---
| | - The Matronics KIS-List Email Forum - | | | Use the List Feature Navigator to browse the many List utilities available such as the Email Subscriptions page, Archive Search & Download, 7-Day Browse, Chat, FAQ, Photoshare, and much more:
http://www.matronics.com/Navigator?KIS-List |
|
| Description: |
|
| Filesize: |
371.54 KB |
| Viewed: |
3335 Time(s) |
|
|
|
| Back to top |
|
 |
jforster(at)baisch.com
Guest
|
| Posted: Thu Sep 09, 2010 4:42 am Post subject: Photo Details |
|
|
OC (and all),


I've done the 90 degree fiberglass brackets as well, and they are great.

Just one more hint: If I'm mounting them to a honeycomb panel, I'll

drill a hole through the bracket and the top skin of the honeycomb

panel.  Then I'll put on the epoxy and rivet the bracket on with an

aluminum pop rivet.  It holds the part in place while curing, and

provides better tension strength than the epoxy alone.


John Forster


--
| | - The Matronics KIS-List Email Forum - | | | Use the List Feature Navigator to browse the many List utilities available such as the Email Subscriptions page, Archive Search & Download, 7-Day Browse, Chat, FAQ, Photoshare, and much more:
http://www.matronics.com/Navigator?KIS-List |
|
|
|
| Back to top |
|
|
fredorosa(at)gmail.com
Guest
|
| Posted: Thu Sep 09, 2010 6:11 am Post subject: Photo Details |
|
|
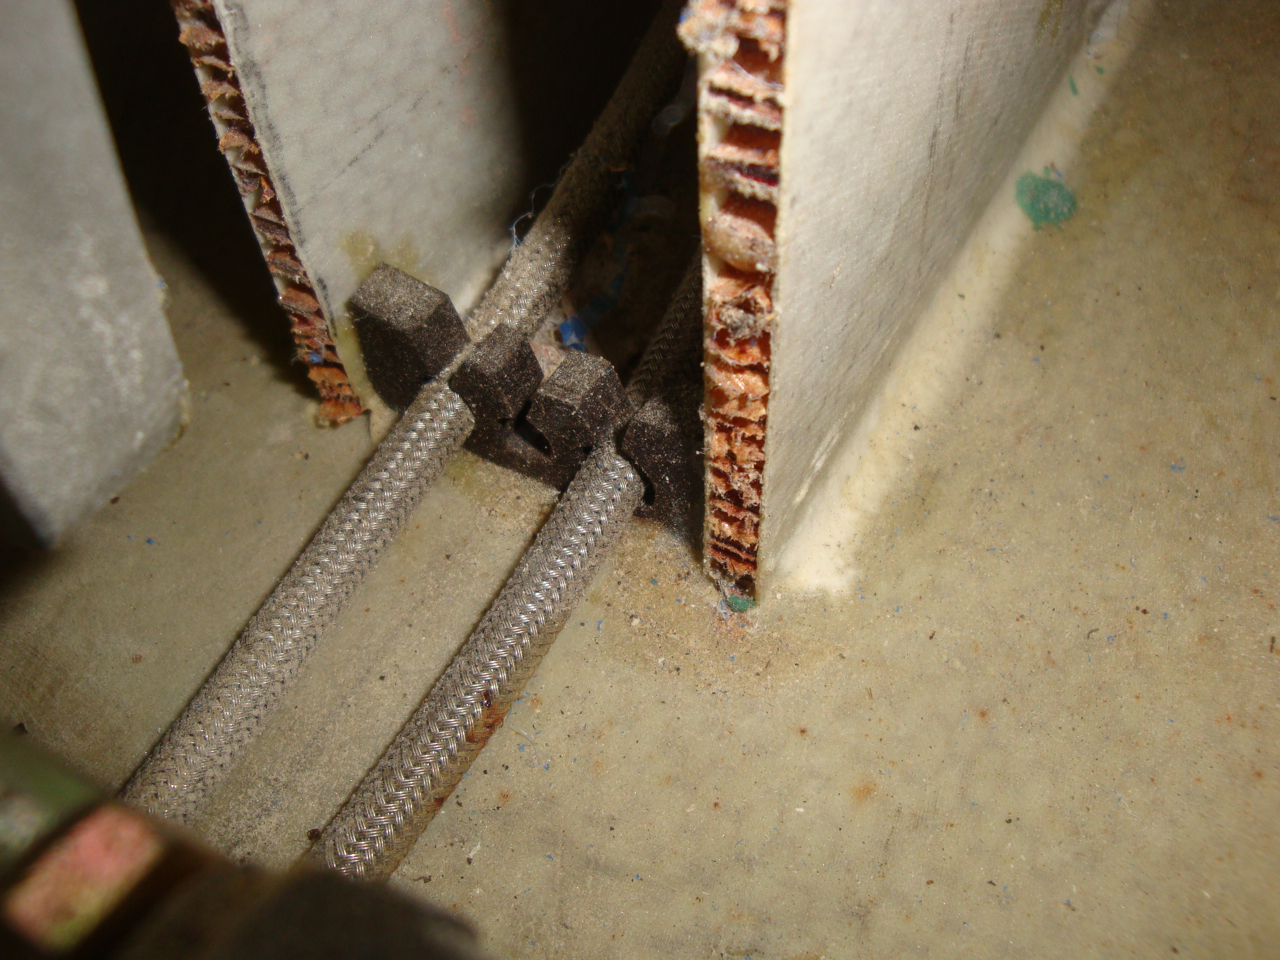
I used a method of attaching lines which would allow easy snap-out and snap-in attaching / detaching.  Using 3/8" medium hard rubber with a holethe diameter of the line.  A slot is cut to the hole to push the line in and out.  The rubber is adhered with epoxy or Gorilla Glue.  See photo (excuse the dust).


Al Rosa

On Thu, Sep 9, 2010 at 8:40 AM, John Forster <jforster(at)baisch.com (jforster(at)baisch.com)> wrote:

[quote] --> KIS-List message posted by: "John Forster" <jforster(at)baisch.com (jforster(at)baisch.com)>


 OC (and all),


 I've done the 90 degree fiberglass brackets as well, and they are great.

 Just one more hint: If I'm mounting them to a honeycomb panel, I'll

 drill a hole through the bracket and the top skin of the honeycomb

 panel.  Then I'll put on the epoxy and rivet the bracket on with an

 aluminum pop rivet.  It holds the part in place while curing, and

 provides better tension strength than the epoxy alone.


 John Forster


 --
| | - The Matronics KIS-List Email Forum - | | | Use the List Feature Navigator to browse the many List utilities available such as the Email Subscriptions page, Archive Search & Download, 7-Day Browse, Chat, FAQ, Photoshare, and much more:
http://www.matronics.com/Navigator?KIS-List |
|
| Description: |
|
| Filesize: |
1.45 MB |
| Viewed: |
3334 Time(s) |
|
|
|
| Back to top |
|
|
fredorosa(at)gmail.com
Guest
|
| Posted: Thu Sep 09, 2010 1:36 pm Post subject: Photo Details |
|
|
PS: A few points that this photo brings to mind:


1) The fuel tank selection valve is unfortunately located right under the flap handle when the flaps are up -- this is inconvenient and I wish that I had located the valve further foward.


It's not to late to move it and you should for safety sake.  This will forever haunt you if you leave it.


2) The neat recess for the fuel valve handle is a stainless steel measuring cup.


You can leave that as a cup holder, or for change for parking meters, etc.


3) The little electric heater mounted on the console is useless for heat and generates noise on the radio. It has been removed.


Good move, or I should say, good remove.


Al

  [quote][b]
| | - The Matronics KIS-List Email Forum - | | | Use the List Feature Navigator to browse the many List utilities available such as the Email Subscriptions page, Archive Search & Download, 7-Day Browse, Chat, FAQ, Photoshare, and much more:
http://www.matronics.com/Navigator?KIS-List |
|
|
|
| Back to top |
|
|
|
|
You cannot post new topics in this forum
You cannot reply to topics in this forum
You cannot edit your posts in this forum
You cannot delete your posts in this forum
You cannot vote in polls in this forum
You cannot attach files in this forum
You can download files in this forum
|
Powered by phpBB © 2001, 2005 phpBB Group
|

