 |
Matronics Email Lists
Web Forum Interface to the Matronics Email Lists
|
| View previous topic :: View next topic |
| Author |
Message |
steve.freeman(at)syntaxds
Guest
|
 Posted: Mon Dec 23, 2013 9:53 pm Post subject: Question to list Posted: Mon Dec 23, 2013 9:53 pm Post subject: Question to list |
 |
|
Hi List,
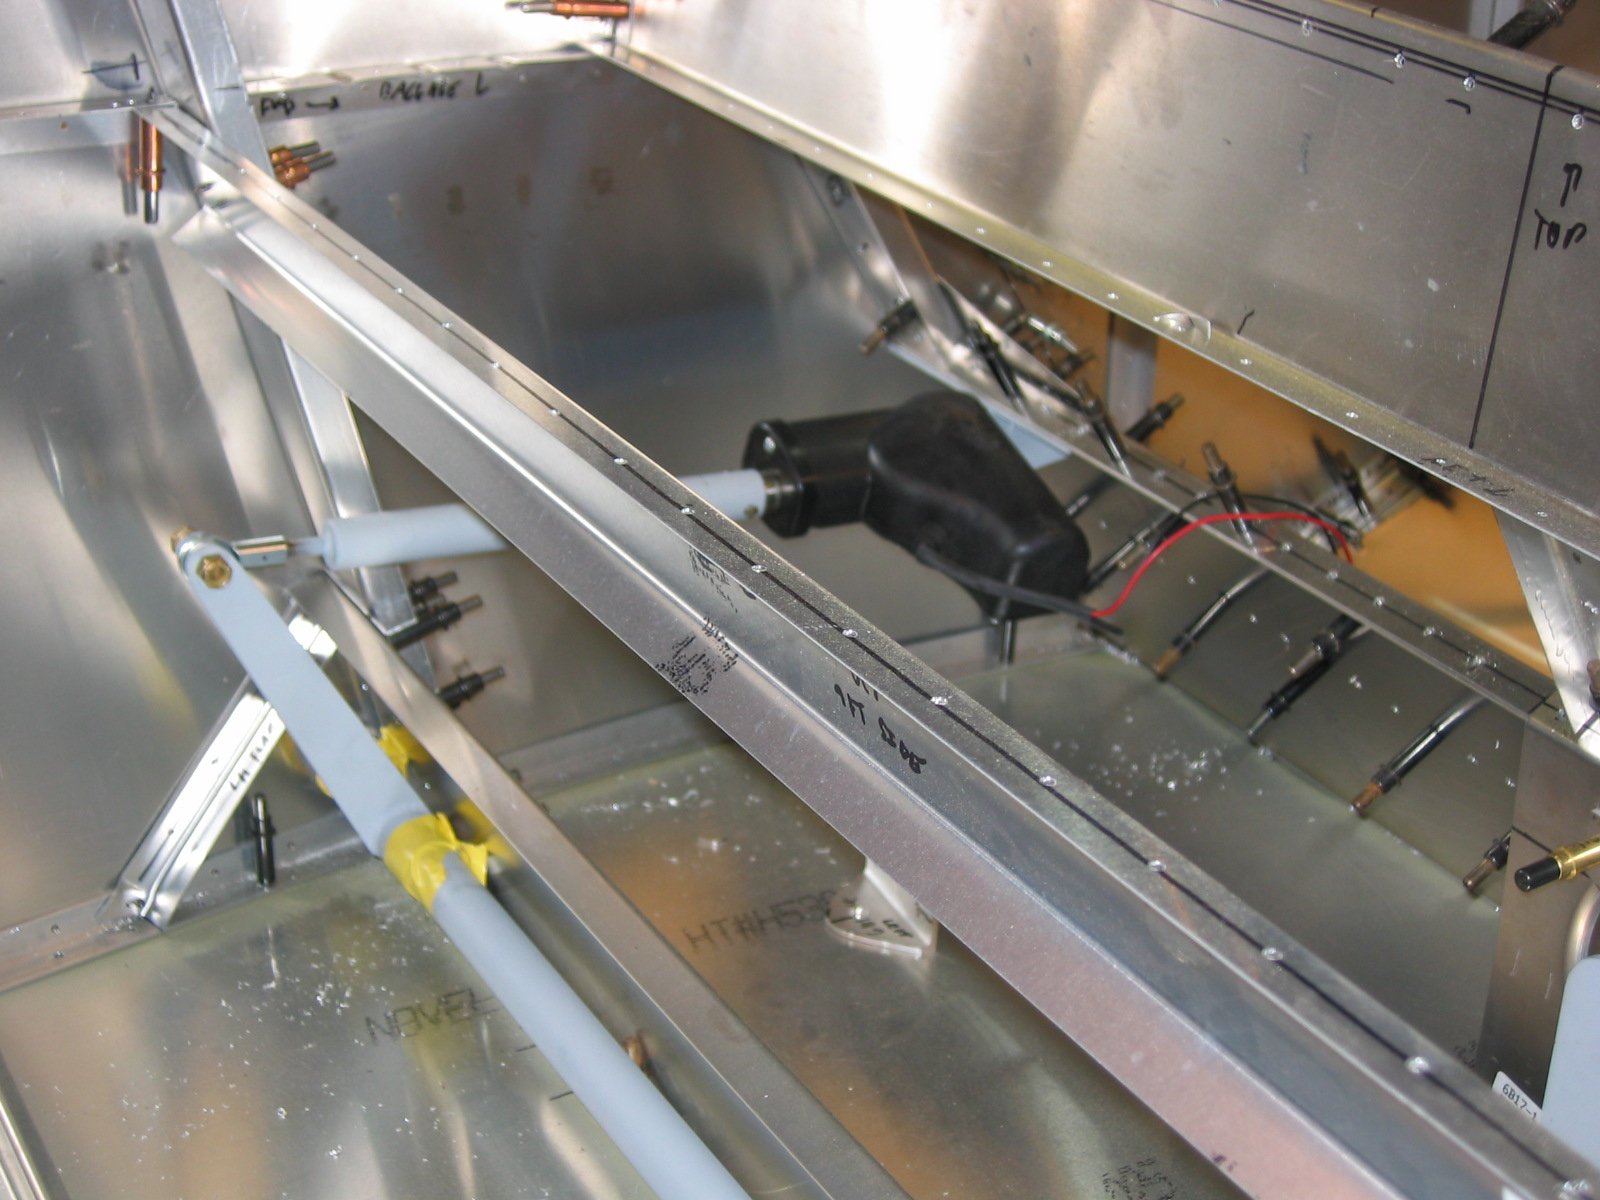
I am getting ready to install my flaps. I have been dreading this because it is one of those things that I fear is really easy to screw up and I am wondering if any of you can offer any advice for how you drilled the torque tube after getting everything lined up where it belongs.
I believe I can figure out how to get the flap in to the right position and secured. But what I am scared of is actually drilling the Torque Tubes and the Flap Control Arm that fits over the Torque Tubes.
Any advice for how any of you did this would be really appreciated.
How did you drill for this location???
[img]cid:image001.png(at)01CF0031.A3F0D2A0[/img]
From: owner-zenith-list-server(at)matronics.com [mailto:owner-zenith-list-server(at)matronics.com] On Behalf Of Carlos Sa
Sent: Thursday, December 19, 2013 6:42 PM
To: zenith-list(at)matronics.com
Subject: today's work
Finished installation of the Hendricks (canopy) latch
More pics here: http://www.zenith.aero/profile/CarlosSa
Carlos
CH601-HD, plans
| | - The Matronics Zenith-List Email Forum - | | | Use the List Feature Navigator to browse the many List utilities available such as the Email Subscriptions page, Archive Search & Download, 7-Day Browse, Chat, FAQ, Photoshare, and much more:
http://www.matronics.com/Navigator?Zenith-List |
|
| Description: |
|
| Filesize: |
83.15 KB |
| Viewed: |
7729 Time(s) |

|
|
|
| Back to top |
|
 |
jaybannist(at)cs.com
Guest
|
| Posted: Tue Dec 24, 2013 6:46 am Post subject: Question to list |
|
|
Hey Steve,  You have a right to be concerned.  This one can be booger.


 I messed mine up, big time.  I thought I had everything lined up and drilled for those bolts.  But when I got everything hooked up and tried it out, it was obviously wrong.  I had to  re-set everything and drill new holes.  I had the old style actuator with the microswitches.  They somehow limited the flap travel called for and no adjustment of the switches would work.  I actually had to design (a real geometry problem) and fabricate an offset extension to the control arm to make everything work right.


 My only suggestion would be to leave drilling for those bolts to the very last.  Wait until you have everything hooked up and can test the action.  Then drill through only the first part of the tube with a #40 drill and cleco (A3).  Check the action.  If it is OK, drill the tubes all the way.  If not, you can re-adjust and do it again.  Access for drilling and installing the bolts and nuts is a bitch, so think it through before proceeding.


 Good luck  --  Jay


  [quote][b]
| | - The Matronics Zenith-List Email Forum - | | | Use the List Feature Navigator to browse the many List utilities available such as the Email Subscriptions page, Archive Search & Download, 7-Day Browse, Chat, FAQ, Photoshare, and much more:
http://www.matronics.com/Navigator?Zenith-List |
|
|
|
| Back to top |
|
|
ding(at)tbscc.com
Guest
|
| Posted: Tue Dec 24, 2013 8:19 am Post subject: Question to list |
|
|
Steve,

                                   I have the older style flap motor, and also had geometry issues to achieve as  much travel as possible. I ended up with 24 degrees, and I'm glad I have all  that. It's been very useful with my short field. To achieve this, I had to cut a  clearance slot in crossmember 65B5-2 in your picture. My initial positioning was  done by drilling 1/8 inch holes in the back side, and using A4 rivits, left side  only. This allows testing without much committment. I felt that Clecos would  allow too much movement to trust. The right side needs only to match the left,  and can be done secondarily. Achieving that little bit of flap twist pressure  against the up stop is critical, and the down position is just a matter of  getting all you can geometrically. Final drilling for bolts is best done  last, by removing the assembly and re-riviting on the bench. I drilled mine  vertically as in your picture to get best access to the bolts.

              Also, if things don't end up just perfect, as mine didn't, the nylon plate in  the end of the flap can be slightly repositioned or replaced as a way to final  adjust without the issues of adjusting at the torque tube inside.

                                                                                                                                         Lynn Dingfelder

                                                                                                                                         601XLb   160 hours

                                                                                                                                         Corry, PA

 [quote]   ---
| | - The Matronics Zenith-List Email Forum - | | | Use the List Feature Navigator to browse the many List utilities available such as the Email Subscriptions page, Archive Search & Download, 7-Day Browse, Chat, FAQ, Photoshare, and much more:
http://www.matronics.com/Navigator?Zenith-List |
|
| Description: |
|
| Filesize: |
83.15 KB |
| Viewed: |
7723 Time(s) |

|
|
|
| Back to top |
|
|
paulrod36(at)msn.com
Guest
|
| Posted: Tue Dec 24, 2013 11:02 am Post subject: Question to list |
|
|
<?xml:namespace prefix="v" /><?xml:namespace prefix="o" /><![endif]-->  Hi Steve--    I did the whole thing somewhat differently.  but it seems to work.   For openers, I bought a 12V  linear motor  from Surplus Parts, for about $70 or so. It had a 4 inch throw, and a 110 pound  push, with internal micro switches.  Just for grins, I mounted the flaps  with clecos, and figured out where I wanted the mtor to be. I mounted it behind  the seat top crosspiece, and  put the transverse (torque) tube in, along  with the flap actuator arms, pins in the holes, etc, everything except the drive  arm.  I then worked out with a protractor, compass, straight edges and  Sharpies, on the table, what it would take for a 4-inch throw to rotate the  flaps 40 degrees. Once I figured that out, I fabricated the drive arm to the  proper length, (allowing for the pivot point to be at the center of the pipe's  interior diameter)and reassembled everything in its proper place. Then, using  MASKING TAPE to hold everything together, I checked that full extension would  drive the left flap very close to 40 degrees. (Don't make perfect the enemy of  good..  As Chris says, it's a garden tractor, not a Space Shuttle) Once  happy with the drive, I rolled the right flap down to match the left, and then,  after putting match marks on the masking tape, separated the torque tube from  the arms with a razor blade. That gave me the distance to overlap the torque  tube, and  lined up how the arms would be oriented. Then I drilled the arms  in place over the tube for an an-3 bolt.  Last thing was to repeat the  process on the drive arm. Actually, once you have made the proper index marks,  you can take it all apart, and  drill with a drill press on the  bench.


 Paul R

 [quote]   ---
| | - The Matronics Zenith-List Email Forum - | | | Use the List Feature Navigator to browse the many List utilities available such as the Email Subscriptions page, Archive Search & Download, 7-Day Browse, Chat, FAQ, Photoshare, and much more:
http://www.matronics.com/Navigator?Zenith-List |
|
| Description: |
|
| Filesize: |
83.15 KB |
| Viewed: |
7721 Time(s) |

|
|
|
| Back to top |
|
|
DaveG601XL
Joined: 27 Oct 2006
Posts: 351
Location: Cincinnati, Oh
|
| Posted: Mon Jan 06, 2014 1:51 pm Post subject: Re: Question to list |
|
|
I 2nd Paul's comment on using tape to secure the torque tubes and control arm together.  Prior to wing fitting, I taped them together just so I could get all the fuselage portion of the flap control system assembled and actuating.  Just a little tape will hold the pieces together quite well.  I waited until after the wings were fitted and flaps cleco'd in place to make the final positioning and drilling.


Good luck,
| | - The Matronics Zenith-List Email Forum - | | | Use the List Feature Navigator to browse the many List utilities available such as the Email Subscriptions page, Archive Search & Download, 7-Day Browse, Chat, FAQ, Photoshare, and much more:
http://www.matronics.com/Navigator?Zenith-List |
|
| Description: |
|
| Filesize: |
232.34 KB |
| Viewed: |
7658 Time(s) |
|
_________________
David Gallagher
Cincinnati, OH area |
|
| Back to top |
|
|
|
|
You cannot post new topics in this forum
You cannot reply to topics in this forum
You cannot edit your posts in this forum
You cannot delete your posts in this forum
You cannot vote in polls in this forum
You cannot attach files in this forum
You can download files in this forum
|
Powered by phpBB © 2001, 2005 phpBB Group
|

